This HowTo walk you through generating and importing a (Microsoft Active Directory) CA created certificate for the HP System Management homepage. But you can use similar steps with other CAs.
1.) Log into the HP System Management Homepage
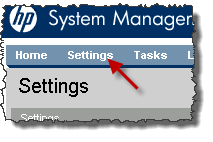
2.) Click on Settings (on the main navigational menu)

3.) Click on Security (under the System Management Homepage box)

4.) Click on Local Server Certificate (under the Security navigational menu)

5.) Under Create PKCS #10 Data, fill out the Organization, Organization Unit, and Alternative Names (the alternative name should be the FQND from the server). Once done click on create.

Note: enter hostname and localhost into the alternative Names with semicolon.
6.) On the server running HP System Management, navigate to C:\hp\sslshare and open the req_cr.pem file using notepad. Now copy the copy the contents of the request to the clipboard.
Note: The prefered way is to do that via RDP
7.) Navigate to your CA´s Web Enrollment page and open a web browser to navigate to https://server/certsrv/. If you need to Login enter your credentials here.
8.) Click on the request a certificate link
9.) Click on the “Or, submit an advanced certificate request” link
10.) Click on the “Submit a certificate request by using a base-64-encoded CMC or PKCS #10 file, or submit a renewal request by using a base-64-encoded PKCS #7 file.” link
11.) Paste in the text you copied earlier from the certificate request file (req_cr.pem) into the field and change the Certificate Template from Administrator to Web Server (or the template you wish to use here).
12.) Download the Certificate as Base 64 encoded and save the file to your desktop as “cert.pem”.
13.) On the server running HP System Management, navigate to C:\hp\sslshare folder and rename the old “cert.pem” to “cert_pem.old”.
14.) Move the newly issued certificate you just saved to your desktop to this folder on the Server.
15.) Restart the HP System Management Homepage service.


