In this article, we will guide you through the process of installing Selenium on a Raspberry Pi running the Bookworm operating system in a headless configuration. This setup is particularly useful if you plan to operate the Raspberry Pi without a monitor. You might use
from selenium import webdriver
from selenium.webdriver.chrome.options import Options

options = Options()
options.add_argument('--headless=new')
driver = webdriver.Chrome(CHROMEDRIVER_PATH, options=options)
as mentioned here. But some webserver blocks headless browser (mentioned here), so we need to come up with another solution in this tutorial for that.
Prerequisites:
Before you begin, ensure you meet the following prerequisites:
- A Raspberry Pi with the Bookworm operating system installed
- A stable internet connection
- Basic knowledge of using the terminal
Steps:
1.) First, update your system to ensure all packages are up to date. Open the terminal and run the following commands:
sudo apt update
sudo apt upgrade -y
2.) Selenium needs a browser and a a WebDriver to interact with the browser. In this example, we will use Chromium. To install it run:
sudo apt-get install chromium-browser
Once installed you can test if its running via:
chromium-browser --version
Which should output something like:
Chromium 129.0.6668.100 built on Debian GNU/Linux 12 (bookworm)
3.) After that we need to install a Chromium driver via
sudo apt install chromium-chromedriver
Once done you can check the result via:
chromedriver --version
4.) After that we can install selenium via:
sudo apt install python3-selenium
5.) After that we need to install the X Virtual Framebuffer via
sudo apt install xvfb
and
sudo apt install python3-xvfbwrapper
6.) Now we need a virtual display as our Pi is running headless. For that we will install pyvirtualdisplay via:
sudo apt install python3-pyvirtualdisplay
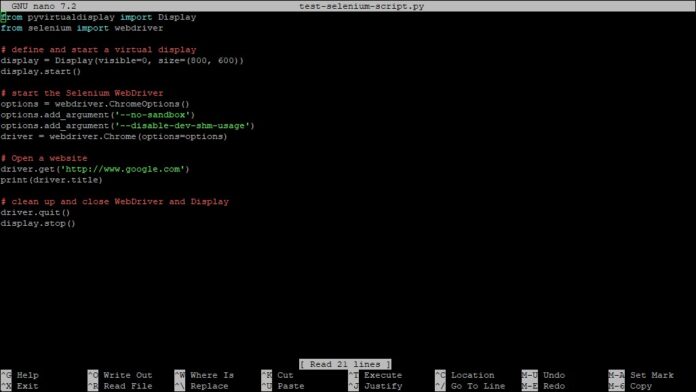
7.) Now we can test if it works. For the test we will create a small python script via:
sudo nano test-selenium-script.py
8.) once open copy the following inside the script:
from pyvirtualdisplay import Display
from selenium import webdriver

# define and start a virtual display
display = Display(visible=0, size=(800, 600))
display.start()

# start the Selenium WebDriver
options = webdriver.ChromeOptions()
options.add_argument('--no-sandbox')
options.add_argument('--disable-dev-shm-usage')
driver = webdriver.Chrome(options=options)

# Open a website
driver.get('http://www.google.com')
print(driver.title)

# clean up and close WebDriver and Display
driver.quit()
display.stop()
After that close nano and save the file
9.) Now we will run the script via:
sudo python test-selenium-script.py
Depending on your device it might take some time until it will show “Google”.
Conclusion:
By following these steps, you have successfully installed Selenium on your Raspberry Pi with Bookworm in a headless configuration. You can now perform automated tests and web scraping tasks on your Raspberry Pi.


