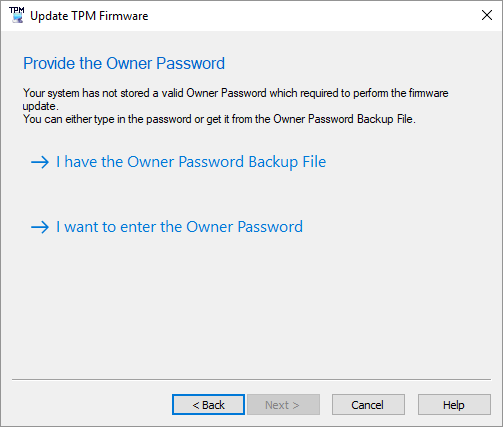
Since the Windows 10 1909 version the Trusted Platform Module (TPM) Owner Password Management is changed and you no longer have a Owner Password or a Backup file. However when you update the TPM firmware you are promped to select one from both to perform the update…

But you do not have a owner password or a backup file, as Windows 10 1909 started to maintain that automatically. So how can you update the TPM firmware?
The following steps where working on my Elitebook 850 G1 (Running Windows 10 1909):
01.) Change the following registry key from 5 to 4:
[HKEY_LOCAL_MACHINE\SOFTWARE\Policies\Microsoft\TPM]
“OSManagedAuthLevel”=dword:00000004
02.) start a CMD (run as admin) and enter TPM.msc
03.) Inside the “Trusted Platform Module (TPM) Management” click on “Clear TPM” which will trigger a reboot
04.) Your PC will now ask you if you really with to clear the TPM chip so press F1
05.) Once you are back online open a powershell (via run as admin) and enter:
Disable-TpmAutoProvisioning
06.) Now you can run the TPM firmware update (for example SP82407.exe)
07.) Once done reboot your PC
08.) Once you are back in windows you can re-run the firmware update. It should tell you now that there is no newer firmware included. After that open a powershell (via run as admin) and enter:
Enable-TpmAutoProvisioning
09.) and change back the regestry key to 5 instead of 4 via:
[HKEY_LOCAL_MACHINE\SOFTWARE\Policies\Microsoft\TPM]
“OSManagedAuthLevel”=dword:00000004
10.) perform a final reboot


